Like most people, we don't have the luxury of unlimited space at home for our hobbies, and again we have the minor problem of lack of indoor space to brew our beer and wine in the cooler autumn months ready for Christmas.
-
Large insulated box with room for the heater and 1 or 2 brewing buckets
-
Small low power heater
-
Cooling element
-
Thermostat to control the temperature
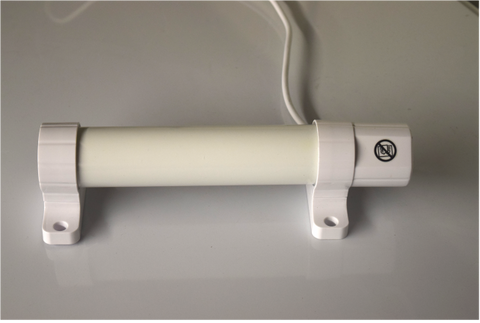
Electric greenhouse heater
Now the tough bit, putting it all together! Well actually not that tough at all really... The freezer had a drain plug in the bottom so I removed that, cut the plug off an old extension lead and passed the cable through the hole in the bottom of the freezer leaving the socket on the inside ready for the greenhouse heater.
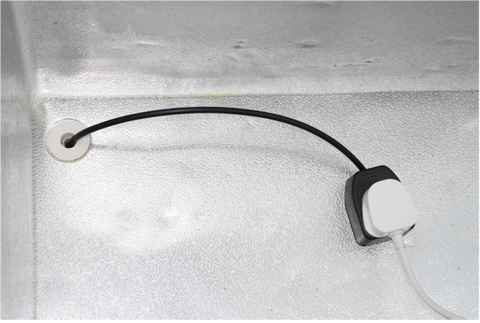
Power routing in freezer for heater.
I put a standard 3-pin mains plug on the other end and connected it to the Inkbird socket marked “Heating”, and plugged the freezer into the socket marked “Cooling”. Finally, I put the temperature sensor into the freezer. Following the supplied Inkbird instructions I set the heater to come on at 21°C and the cooler kicking in at 24°C, The Inkbird also has a handy alarm feature which can be set so an audible alarm will sound if it becomes too hot or cold.
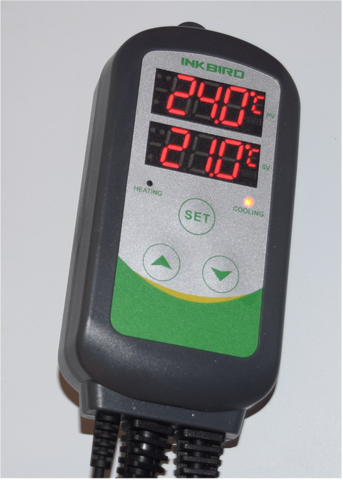
Inkbird thermostat controlling the heating and cooling
I'll point out that my original intention was to spend as little as I could, preferably under £20 and I think that would have been possible if I had made an insulated box with a heater. This would have been functional, but not ideal as it would have been hard to control the temperature accurately. Instead, I spent just short of £60 - so what have we got, and are the benefits worth it?
-
I have an insulated brewing cupboard that turns the heating or cooling on when needed, so I can get a consistent temperature for every brew.
-
When we are having a birthday party or BBQ, we can remove the heater and reset the temperature so that the entire brewing cupboard becomes a fridge for all the home brew that our guests may want to sample!
-
And finally – should we need the space in the run up to Christmas, we can adjust the temperature down again and use it as a temporary freezer.
All in all, I think it is almost perfect and a bargain!


1 comment
Genius!!